Windows firewall prevents unauthorized entities from accessing your personal computer and the information stored on it. It blocks malicious hackers and unwanted malware from accessing your files and from modifying the settings. Although every release of Windows deals with the new security challenges, malware and hackers still try to access your PC, to infect it with viruses, or steal personal data and information from it. Here comes into play the firewall.
The firewall monitors and establishes a set of rules concerning how apps on your computer are allowed to communicate via the local network connection with the Internet. Windows firewall also blocks incoming connections but allows software on the computer (such as web browsers) to work normally, based on a pre-established set of rules.
Dealing with the threats behind the scenes, the firewall is also useful to boost security of your wireless network, preventing other people connected to the same network from accessing your PC.
Let’s see how to set up the firewall in Windows 10.
1. Where is the firewall?

You have three possibilities to get access to the firewall in Windows 10. Either browse the settings to find its location or ask Cortana, the personal assistant, for the firewall’s location. You can also type “firewall” in the search box in the task bar.
2. Check the current status of the firewall

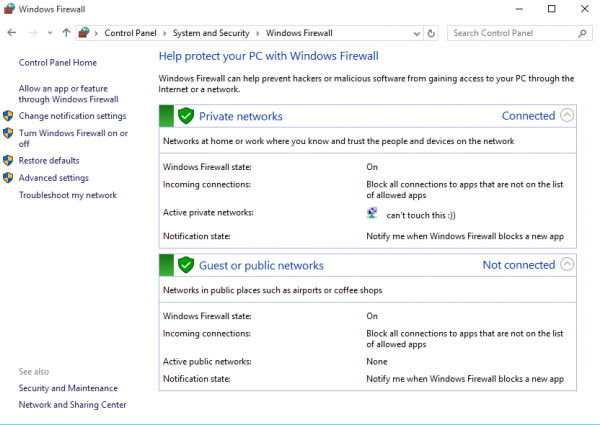
With any genuine Windows 10 installation, the firewall is ON by default. However, if you upgraded from a previous version of Windows, the firewall would be probably enabled. So you have to check the status.
3. Configure the firewall
Make sure the firewall is ON for both Public and Private networks. Also, you may want to tick the boxes to receive notifications.
4. Everything is just fine

Once you have set everything right, the firewall buttons should be green. See the image above as an example


